


Friday, December 7, 2012
So Many Updates!
I hosted my first ever Thanksgiving where Bill's family met my family for the first time. Everyone had a fun time and my food was a big hit! I made an herb butter rub that made the turkey perfectly golden brown (love that crispy skin!), and Giada de Laurentis' baked mashed potatoes. Everyone helped out with the appetizers, stuffing, gravy and desserts. For dessert I baked an apple cream cheese turnover and whipped up some homeade fudge.
We finally got all of our Christmas decorations up, I can't believe how amazing it all looks. We got the 12' Christmas tree from Hobby Lobby. Decorating it was a bit tricky (we spent a fair amount of time balancing on ladders and the ottoman in the living room) but it was so worth it. The neighbors love seeing the tip of it through the second floor window. Bill rigged the star together out of stuff we found at HomeGoods. The garlands are the final touch. The whole room makes me feel like I'm in a Charles Dickens novel, it's so cozy and warm.


 |
| My table setting |
 |
| How cute are these name tags? |
 |
| The whole spread |
 |
| Soo happy with how this 14 lb. bad boy turned out! |
We finally got all of our Christmas decorations up, I can't believe how amazing it all looks. We got the 12' Christmas tree from Hobby Lobby. Decorating it was a bit tricky (we spent a fair amount of time balancing on ladders and the ottoman in the living room) but it was so worth it. The neighbors love seeing the tip of it through the second floor window. Bill rigged the star together out of stuff we found at HomeGoods. The garlands are the final touch. The whole room makes me feel like I'm in a Charles Dickens novel, it's so cozy and warm.


Sunday, November 4, 2012
Treats for Chickens
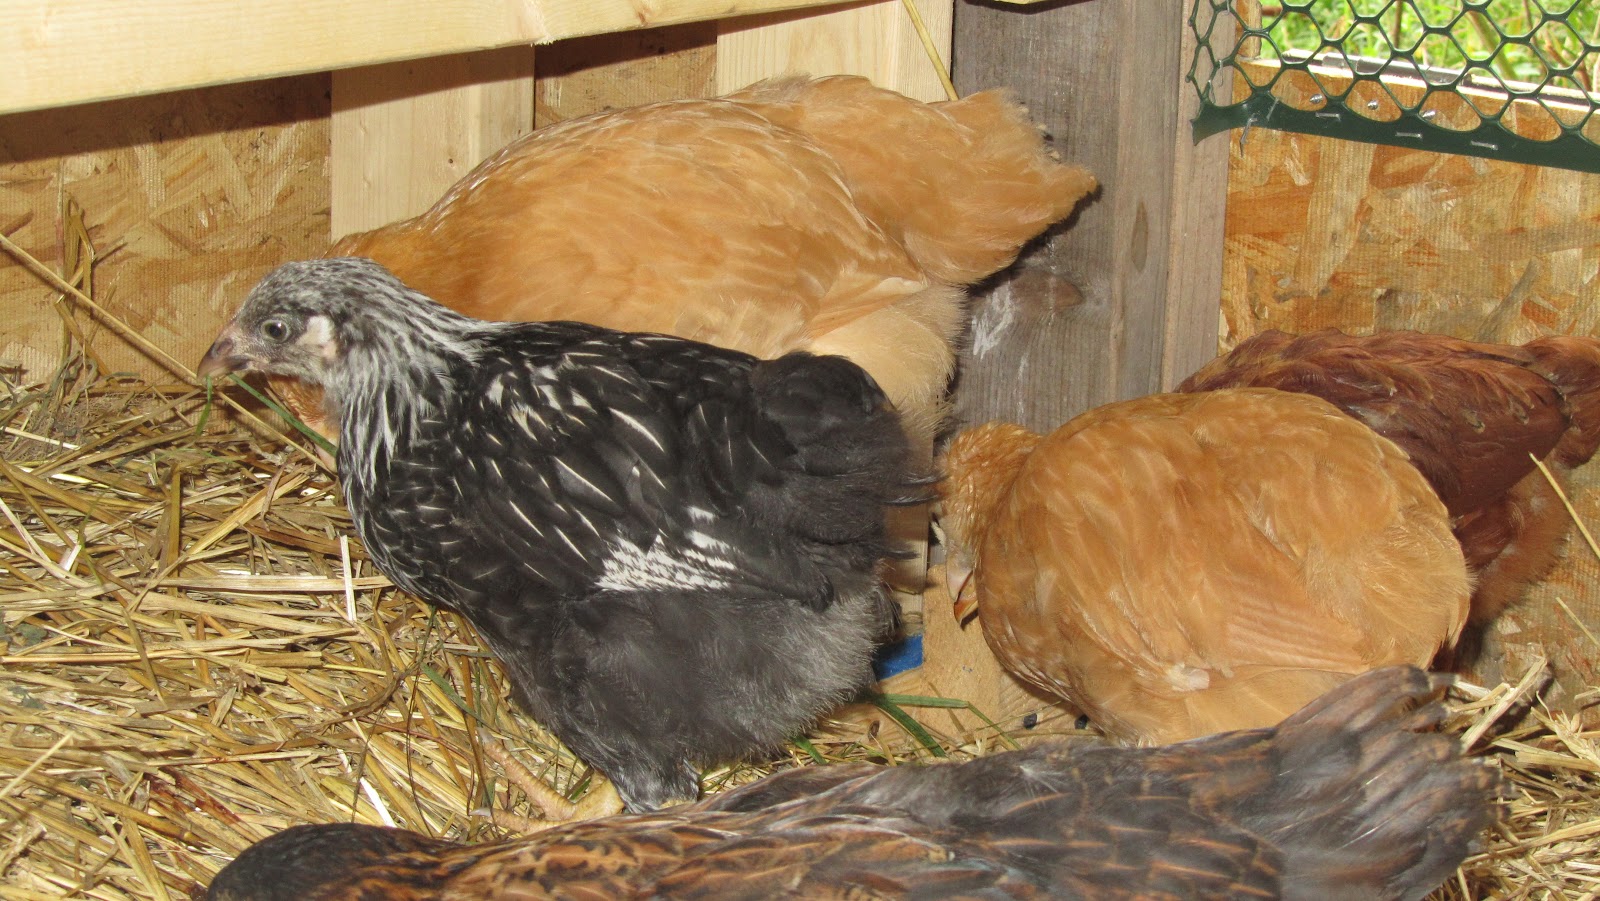
Our chickens are getting bigger every day! It's so much fun to see them interact with each other, they all have such distinctive personalities. The little Ameraucana is always scratching in the dirt for worms, and the two Buff Orps are so friendly and docile-they're always the first ones to fly up onto my lap when I'm sitting out with them. Lately I've been experimenting with different treats and reading up on what they shouldn't have. So far I've found that they absolutely love cottage cheese, cabbage, acorn squash, and pumpkin. They weren't huge fans of carrots. Next I'm going to try some cooked pasta, I keep hearing they go crazy for it. It's so fun to watch them try something new. What do your chickens like to eat? I'd love some more ideas!
Here they are enjoying one of our leftover Halloween pumpkins


Here they are enjoying one of our leftover Halloween pumpkins


Tuesday, October 16, 2012
Diorshow Mascara Review
Can I just begin by saying how much I adore Dior? My purse is never without at least one shade of the Addict Ultra glosses, and their scents have always worked really well with my body chemistry. When the amazing folks at People Stylewatch (one of my favorite mags!) offered me the opportunity to test drive their Diorshow mascara, I nearly fell over. I have used and loved the Diorshow Maximizer Lash Plumping serum for over a year now, and couldn't wait to see how it looked paired with the Diorshow mascara. I was not disappointed. The thick, almost fluffy brush holds the perfect amount of product, making it very buildable for a natural or dramatic look. The mascara literally glides on and gives my lashes that voluminous, plush look. Many mascaras get clumpy after a few coats, but with it's creamy, almost gel-like texture Diorshow made it simple to get that doll-eyed look with only a few coats, and no smudging or flaking. I really like how my lashes feel soft and natural to the touch even though they look like crazy long false lashes. Several people actually asked me if I was wearing false lashes, so it's safe to say I'm a new fan of Diorshow. Plus I just love seeing the mascara tube on my vanity, the packaging is so glam-I'm a sucker for that Old Hollywood style. :)
Visit www.dior.com and enter DIORPSW2012 at checkout to receive complimentary ground shipping on all Dior Beauty purchases now through December 31-I know I'll be stocking up!


Disclaimer: This product was provided by People Stylewatch in order for me to give an honest review. No compensation was given, all opinions expressed are completely my own.
Visit www.dior.com and enter DIORPSW2012 at checkout to receive complimentary ground shipping on all Dior Beauty purchases now through December 31-I know I'll be stocking up!

 |
| Diorshow with the amazing Maximizer Plumping Serum..LOVE!! |
 |
| Wearing two coats of Dior with the Dior Plumping Serum |

 |
| Ok now I'm just hammin it up! :D |

Sunday, September 23, 2012
Our New Chickens!!
I still can't believe we actually have chickens! I'm a city girl so having chickens running around the yard is something I never anticipated. Bill and I have been researching and talking to people to get as much info as we can find. The people at Marzen's were incredibly helpful, as well as the folks at Country Junction where we finally picked up them up. We got two each of the Rhode Island Reds, Buff Orpingtons, Silver Laced Wyandottes, and the Americaucanas (these are the ones who lay the pretty colored Easter eggs!). I love their funky green feet.


 |
| This Silver Laced Wyandotte almost escaped! Chickens are a lot faster than I thought! |

 |
| Bringing them home (9/21/12) |

 |
| Exploring their new coop |


 |
| I threw a few crabapples in there but they seemed more interested in their feeder! |
Monday, September 17, 2012
Cruisin in the Camaro
The weather has been so gorgeous lately, we decided to go for a cruise in the Camaro around Jim Thorpe. It's such a gorgeous town in the fall. We stopped for pumpkin ice cream at Annie's..what a fun day!


Saturday, September 15, 2012


Wednesday, September 5, 2012
Our Trout Pond
Our trout pond just went from draught conditions to completely full and now they are spawning! It's amazing what a few days of rain can do. 

Tuesday, August 28, 2012
An Amazing Day at Beltzville Lake
I'm really happy we got a chance to get out on the lake at least once more before we have to get the boat winterized, summer sure did fly by this year!

.JPG)


.JPG)


Friday, August 17, 2012
Sonia Kashuk Illuminating Bronzer

I picked this up yesterday at Target in "Goddess" and it is AMAZING, totally my new favorite bronzer. It has a gorgeous golden bronze sheen that is perfect for sweeping on cheeks, shoulders and collarbones. I love the wet, silky texture that just glides over skin. The crocodile pattern is cute, though the compact is a bit bulky due to the included useless brush (I use the MAC 167 Face Blender Brush). I can't believe it's only $12.99, I can actually picture this replacing my Too Faced Chocolate Soleil Bronzer. This shade is so universally flattering (and well pigmented) it would suit a wide variety of skintones. The wash of shimmer is so much easier to work with than the glittery chunks contained in many bronzers. I just swept it on the areas of my face that the sun naturally hits and was out the door. Love!

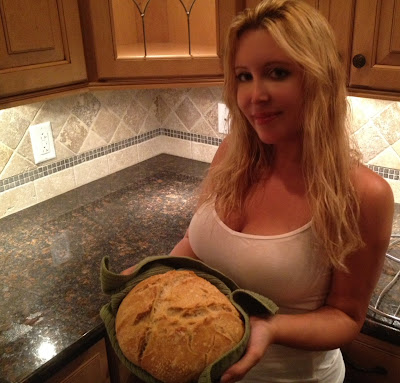
No-Knead Bread Dough Recipe
I always really look forward to baking. There's just something about whisking batter or kneading dough that has a cathartic effect on me. Smelling the warm buttery fragrance of vanilla cupcakes wafting throughout the house or the cozy aroma of a crisp loaf of bread rising in the oven just soothes my nerves. Since we are still getting set up here in the farmhouse, I'm still missing a lot of necessities like my KitchenAid mixer. I've been craving some home baked bread so I was browsing online recipes to see how I could improvise when I ran across this easy looking no-knead bread dough recipe on another blog-FrugalLivingNW.com.
Frugal Living NW No-Knead Bread Dough Recipe
I set to work combining all the ingredients, which took me about ten minutes. Then I set the dough ball in a bowl, covered it with plastic wrap, and let the dough rise for around 15 hours. When I checked it, it had doubled in size, was slightly darker, and the top was covered with tiny holes. That's how you can tell that you're ready for the next step.

I then prepared a well floured surface (I used a tea towel-not terry cloth), and using well floured hands I tucked the dough over and under a few times until it was a rough ball, but still sticky. I then let it rise an additional 2 hours until it doubled in size. During the last 30 minutes of rise time, I placed a Dutch Oven into the oven with the lid on to get warm before I added the bread. The blogger used a six quart, but all I have on hand is a three quart Emile Henry so I halved the ingredients, resulting in a smaller loaf of bread. I baked it at 425 degrees for 40 minutes covered, then 10 minutes uncovered, as suggested. What do you guys think?
 |
| We used it to make French Toast, toasted it with butter and jam, and nibbled on it plain..delicious! |


Basic No-Knead Breadslightly adapted from Jim Lahey’s My Bread
6 cups bread (recommended) or all-purpose flour, plus more for work surface
1/2 t. instant or active-dry yeast
2 1/2 t. salt
2 2/3 c. cool water
2 1/2 t. salt
2 2/3 c. cool water
- In a large bowl, combine the flour, yeast, and salt. Add the water and stir until all the ingredients are well incorporated; the dough should be wet and sticky. Cover the bowl with plastic wrap. Let the dough rest 12-18 hours on the counter at room temperature. When surface of the risen dough has darkened slightly, smells yeasty, and is dotted with bubbles, it is ready.
- Lightly flour your hands and a work surface. Place dough on work surface and sprinkle with more flour. Fold the dough over on itself once or twice and, using floured fingers, tuck the dough underneath to form a rough ball.
- Generously dust a cotton towel (not terry cloth) with enough flour, cornmeal, or wheat bran to prevent the dough from sticking to the towel as it rises; place dough seam side down on the towel and dust with more flour, cornmeal, or wheat bran. Cover with the edges or a second cotton towel and let rise for about 2 hours, until it has doubled in size.
- After about 1 1/2 hours, preheat oven to 425-450 degrees. Place a 6-8 quart heavy covered pot, such as a cast-iron Dutch oven, in the oven as it heats. When the dough has fully risen, carefully remove pot from oven. Remove top towel from dough and slide your hand under the bottom towel; flip the dough over into pot, seam side up. Shake pan once or twice if dough looks unevenly distributed; it will straighten out as it bakes.
- Cover and bake for 40-50 minutes. Uncover and continue baking about 5-10 more minutes, until a deep chestnut brown. The internal temp of the bread should be around 200 degrees. You can check this with a meat thermometer, if desired.
- Remove the bread from the pot and let it cool completely on a wire rack before slicing.
Subscribe to:
Posts (Atom)


