Frugal Living NW No-Knead Bread Dough Recipe
I set to work combining all the ingredients, which took me about ten minutes. Then I set the dough ball in a bowl, covered it with plastic wrap, and let the dough rise for around 15 hours. When I checked it, it had doubled in size, was slightly darker, and the top was covered with tiny holes. That's how you can tell that you're ready for the next step.
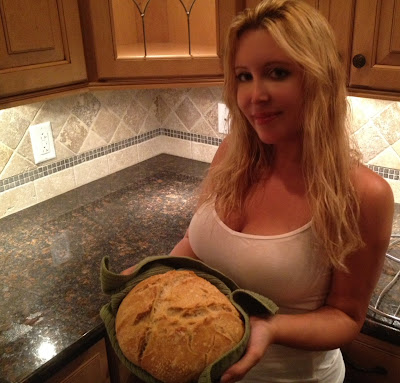
I then prepared a well floured surface (I used a tea towel-not terry cloth), and using well floured hands I tucked the dough over and under a few times until it was a rough ball, but still sticky. I then let it rise an additional 2 hours until it doubled in size. During the last 30 minutes of rise time, I placed a Dutch Oven into the oven with the lid on to get warm before I added the bread. The blogger used a six quart, but all I have on hand is a three quart Emile Henry so I halved the ingredients, resulting in a smaller loaf of bread. I baked it at 425 degrees for 40 minutes covered, then 10 minutes uncovered, as suggested. What do you guys think?
 |
| We used it to make French Toast, toasted it with butter and jam, and nibbled on it plain..delicious! |
Basic No-Knead Breadslightly adapted from Jim Lahey’s My Bread
6 cups bread (recommended) or all-purpose flour, plus more for work surface
1/2 t. instant or active-dry yeast
2 1/2 t. salt
2 2/3 c. cool water
2 1/2 t. salt
2 2/3 c. cool water
- In a large bowl, combine the flour, yeast, and salt. Add the water and stir until all the ingredients are well incorporated; the dough should be wet and sticky. Cover the bowl with plastic wrap. Let the dough rest 12-18 hours on the counter at room temperature. When surface of the risen dough has darkened slightly, smells yeasty, and is dotted with bubbles, it is ready.
- Lightly flour your hands and a work surface. Place dough on work surface and sprinkle with more flour. Fold the dough over on itself once or twice and, using floured fingers, tuck the dough underneath to form a rough ball.
- Generously dust a cotton towel (not terry cloth) with enough flour, cornmeal, or wheat bran to prevent the dough from sticking to the towel as it rises; place dough seam side down on the towel and dust with more flour, cornmeal, or wheat bran. Cover with the edges or a second cotton towel and let rise for about 2 hours, until it has doubled in size.
- After about 1 1/2 hours, preheat oven to 425-450 degrees. Place a 6-8 quart heavy covered pot, such as a cast-iron Dutch oven, in the oven as it heats. When the dough has fully risen, carefully remove pot from oven. Remove top towel from dough and slide your hand under the bottom towel; flip the dough over into pot, seam side up. Shake pan once or twice if dough looks unevenly distributed; it will straighten out as it bakes.
- Cover and bake for 40-50 minutes. Uncover and continue baking about 5-10 more minutes, until a deep chestnut brown. The internal temp of the bread should be around 200 degrees. You can check this with a meat thermometer, if desired.
- Remove the bread from the pot and let it cool completely on a wire rack before slicing.


0 comments:
Post a Comment